It’s a pleasure to check another job off the list, particularly one that’s been in the works for a few years.
This week I finished construction on a mud-season feeding area for our cattle. From late April through November our cattle are grazing grass directly from the fields, and then during the winter we bring them bales of grass out on the pastures. That system has worked well over time, with one significant exception: mud season.
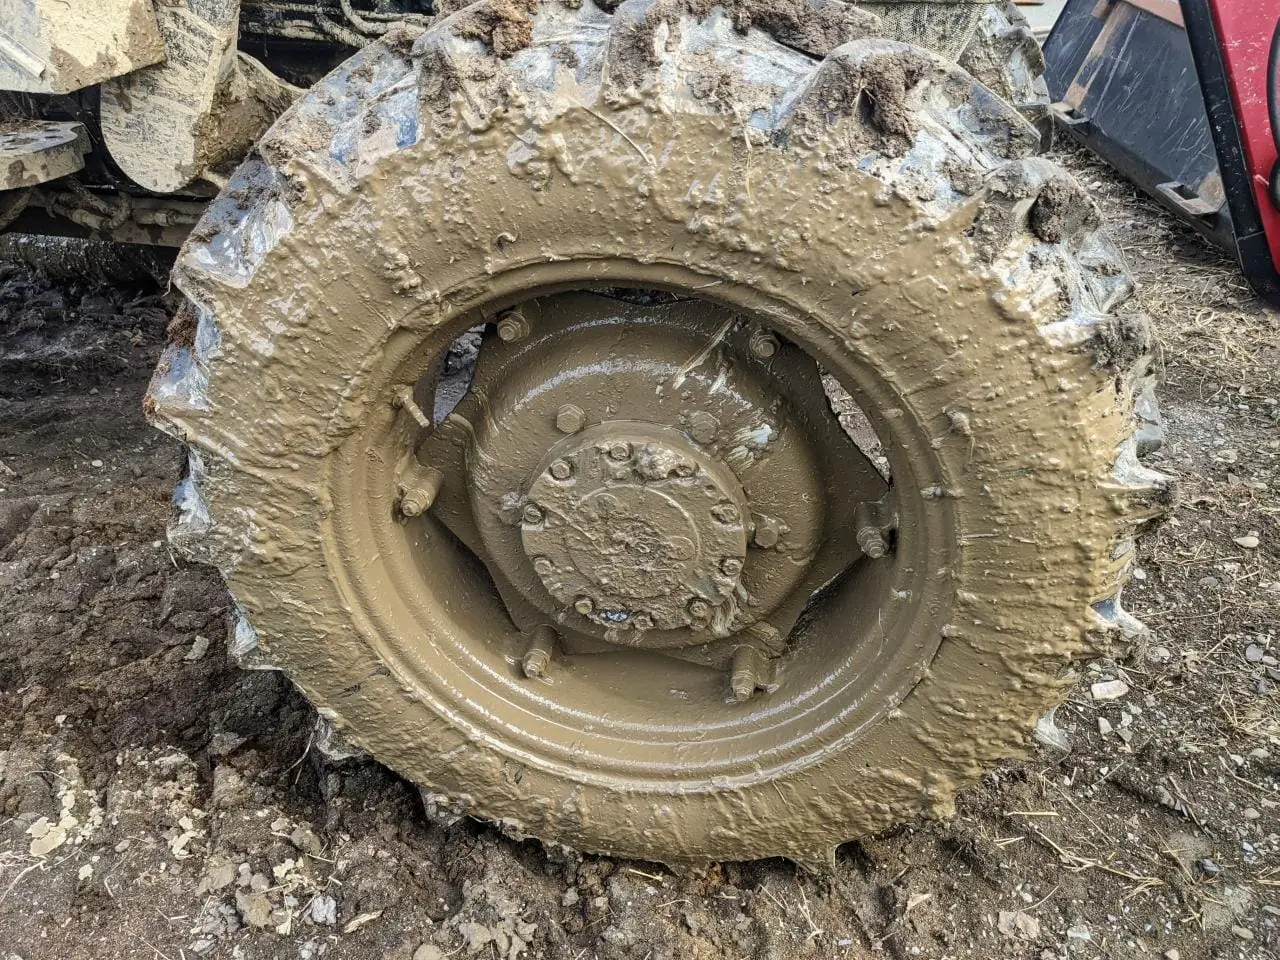
Mud season for us includes most of the month of March and the beginning of April. Each year is a little different, but we always have mud. Deep, gooey mud. The combination of snow, spring rains, and thawing pastures creates miry messes. Cattle sink deep into the mud, their feed sinks into the mud, and woe to the person who needs to get a tractor out there!
I’ve designed and built a feeding area in hopes of creating a better environment for the cattle to wait out the mud season. I still intend to feed bales on pasture during the frozen parts of winter, since that distributes the fertility from their manure into all the fields that need it most. But I felt compelled to do something about the mud season. I wanted a design that would give the herd a dry place on firm footing when the cattle needed it.
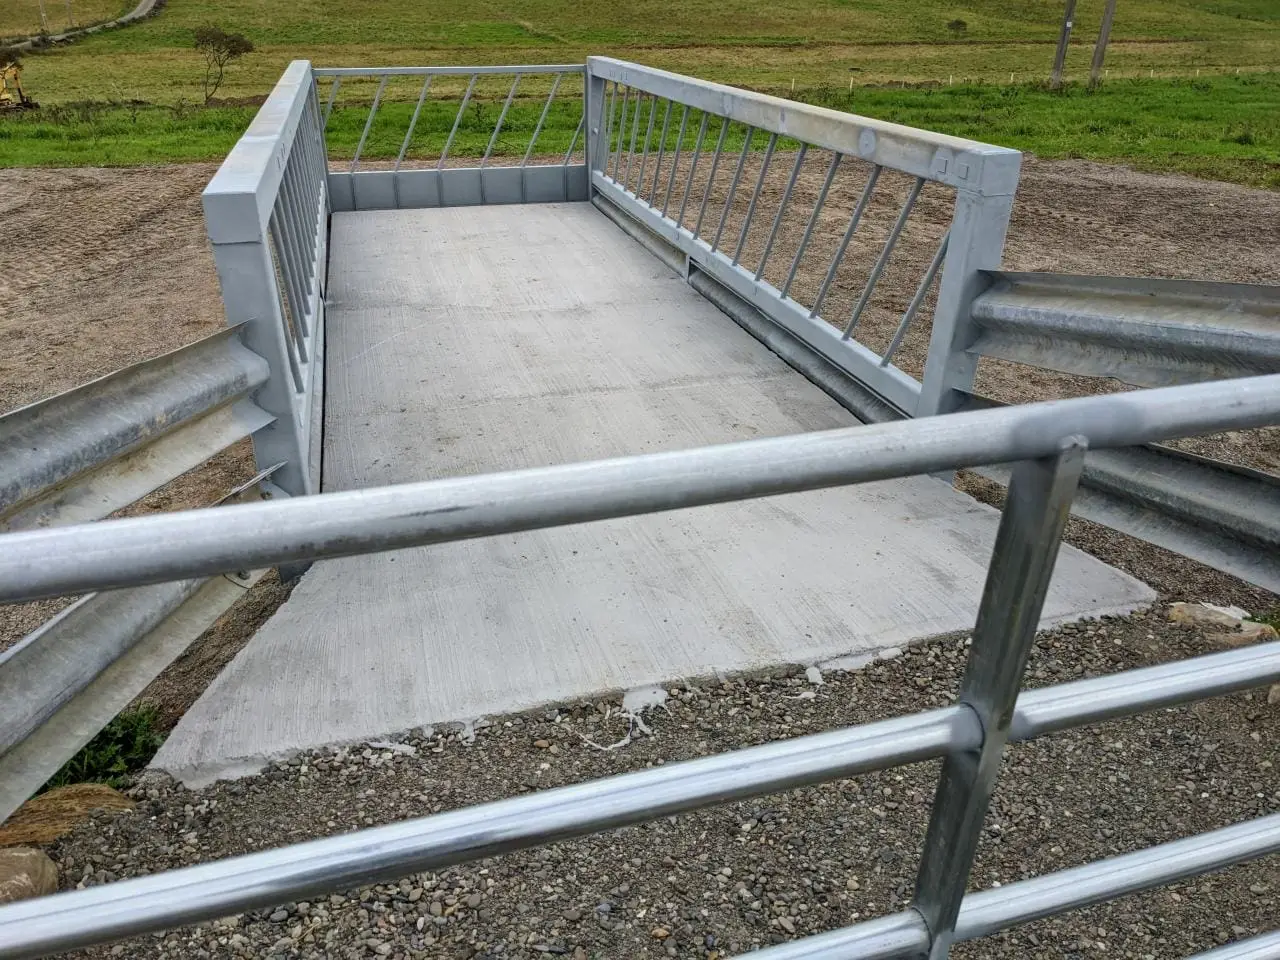
The idea is based on the “fenceline feeder” concept. In this implementation, I’ve built the feeding area adjacent to our road, so I can bring the bales to the cattle directly from the paved surface. I selected the spot both for its proximity to the paved road, and for its slope. This is a nice ridgetop location, so it is well-drained and the least prone to mud anywhere on the farm. We installed a mud-resistant stone pad and a rack for feeding bales up out of any slop.
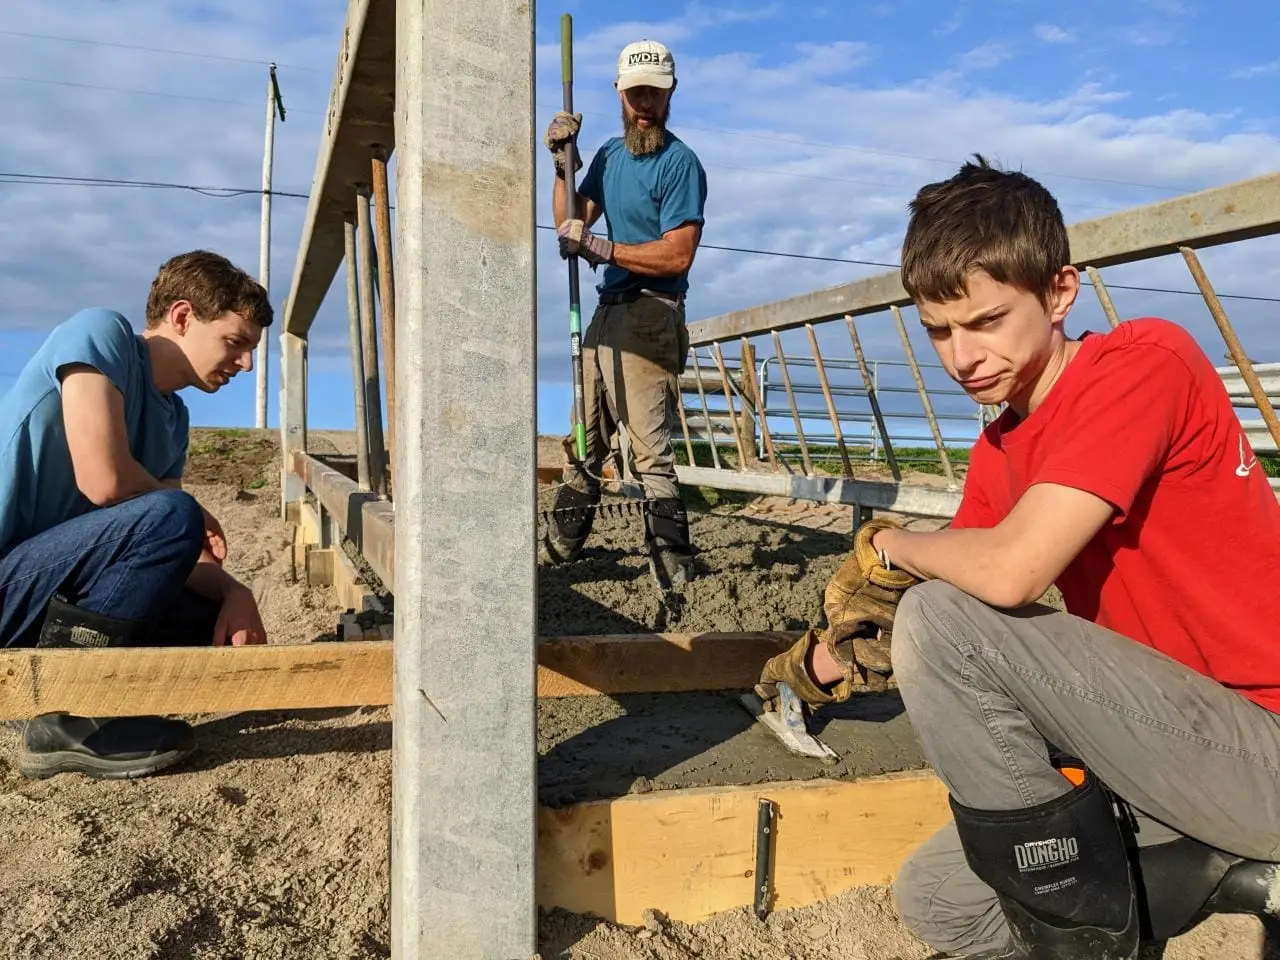
The feeding area measures fifty feet by forty feet. After scraping down to subsoil, I laid down geotextile fabric and some geogrid reinforcement and then placed a six inch layer of crushed stone. Since cattle don’t like standing on rough rocks, I topped that with a thinner layer of quarry stone dust to make it more comfortable underfoot.
I’ve fabricated a feed rack that holds five bales of hay, enough for several days of eating. The materials for the rack came almost entirely from salvaged steel, some from highway guardrails and the rest from ancient-but-still-useful galvanized pipe I’ve found lying about the farm. I needed to purchase two pipes to finish the job, but I came close to salvaging the entire thing. If you look around our farm, you’ll see that most of our projects involve reused and repurposed materials. Like everything I build, there’s a chance this is a tiny bit overbuilt. But if a few dozen eager cattle are going to be shoving against it, I want it to be tough.
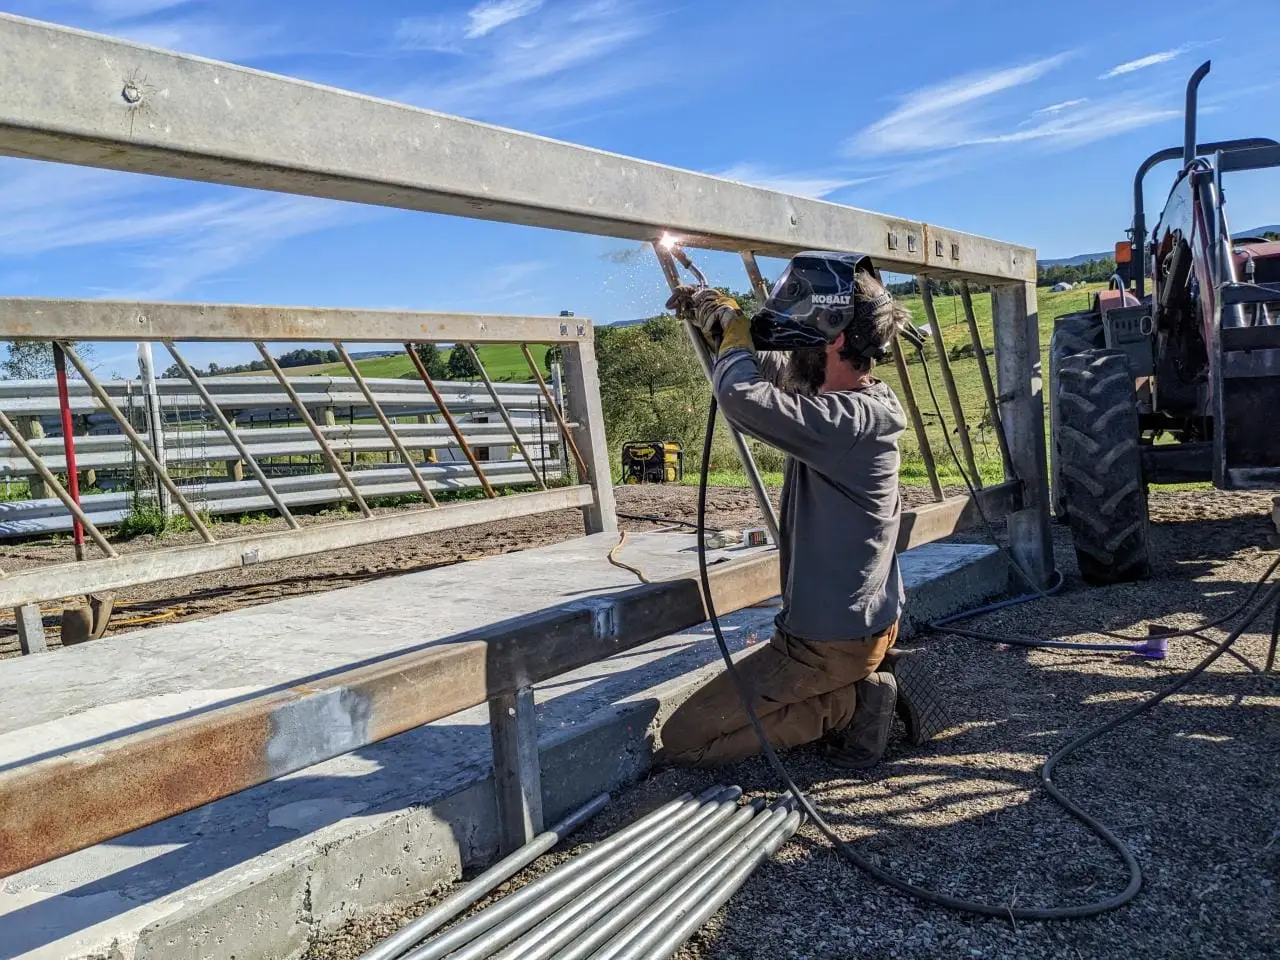
There are a few important design features here that should substantially improve our feeding. First, I’ve elevated the surface with a six inch concrete pad to prevent moisture and mud from wicking up into the bales of grass. Keeping things dry reduces the potential for spoilage and waste. Second, we’ve used slanted divider bars on the feeder. Cattle are less likely to pull their head out of slanted feeders between each bite, so they won’t spill and trample as much grass as they would with a more open feeder configuration. Third, the feeder makes it easy for me to collect any feed the cattle can’t reach. I’ll just open the gate at the road and pack in the new bales end-to-end. Any uneaten grass will be plowed to the front as I push in the new bales.
Each season I’ll need to scrape manure from the pad and spread it during the growing season. One reason I want to limit the use of this area is to reduce the amount of manure that will need to be spread. It’s not a job I love, and I’d much prefer for the cattle to spread it on their own. But I believe the benefit of preserving the fields with less mud-related rutting and compaction will be an acceptable exchange for an few hours of spreading manure.
So this is what the system looks like while it is still new and shiny. The shakedown testing will come next spring when we see what kind of hurting a herd of rowdy beefers can put on it. I’m not yet ready to proclaim it a success. The cattle always find ways to show me how I can do things better. But I have hopes that this is an improvement.
6 thoughts on “Building a Fenceline Feeder for Mud Season”
Looks amazing! Given all the engineering, why didn’t you add some kind of roof to keep the hay dry?
Yes, I did consider options for covering, but I think the cattle eat through the hay quickly enough that it won’t really suffer even if it gets rained on. My plan is to only load it with two or three days worth of bales at a time.
If, after using it for a while, it seems like a roof would be better, I could extend the sides higher and build a roof. Or maybe I could protect the feed with a simpler hoop-type tarp covering. The frame is built stoutly enough to support a roof if it should prove necessary.
You got any new pics and thots after using it one winter?
How wide is it inside to inside?
It all worked well. We didn’t use it all winter, just for the mud season in April. But the system is pretty good. I’ll need to replenish some of the stone dust that they kicked out near the feeders, but it won’t take much to get that all restored for next spring’s use.
The feeder is 8′-6″ wide on the inside. That’s a convenient size for the tractor, but the cattle can’t reach a band of about 16″ down the middle, so I end up needing to push that out to the cattle by hand, but that just takes a few minutes.
Love you slantbars they look they will take alot of abuse . Project looks great I really gotta do the same thing for my winner lot
Thanks for sharing it’s always inspiring
Thanks Chris. I’m eager to see how it all works out once the season rolls around. Some years we get a few muddy weeks in the December before the winter weather sets in, so I might have some opportunity to test it earlier instead of waiting until the spring.